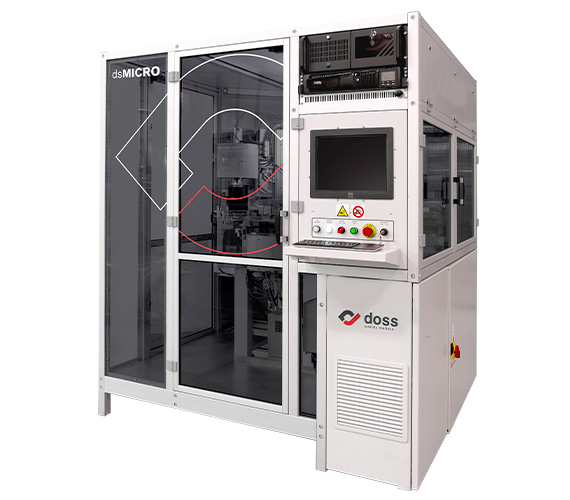
dsMICRO
MICRO INSPECTION, MACRO PERFORMANCE
dsMICRO is designed to perform surface and dimensional inspections of very small components such as O-rings.
- THOROUGH INSPECTION OF VERY SMALL PARTS
- DETECTS UP TO 3 NON-CONFORMITIES
- TAKES UP LITTLE SPACE
- OPTIMIZED HANDLING OF MICRO-PARTS

Inspections
- Flatness
- Profile for detecting flashes and incomplete fills
- Dimensional
- External and internal surfaces
- Presence of cuts, fractures, and bubbles
Standard equipment
- Top and Bottom Surface Stations
- Barrel Laser
- Peripheral 8-sided pyramidal station
- Up to 5 supported inspection stations
- Up to 3 exits for non-conformities
- Antistatic system to facilitate part separation
- Standard vibratory bowl feeder
- Various packaging options available
- Various feed systems to choose from
Optional
- Metal detector
- Multi-shot
- 4-view peripheral
- Radial station
- Telecentric lens
Description
The machine is fed through a vibratory bowl feed system specially designed for very small parts.
At the end of the inspection cycle, the parts are separated and packaged into small plastic containers (defective parts, compliant parts, and samples) using a vacuum separation system.
The machine is equipped with an antistatic system that ensures proper handling of the parts.
For each batch, the operator has access to documents which summarize the compliant parts, details regarding defective parts, and statistical reports.
- Statistics and reports
- Batch traceability
- Remote management
- Interacts with management software (M.E.S.)

-
FEEDING SYSTEM
Parts are loaded into the machine by the loading systems.
-
INSPECTION UNITS
Parts pass throught various units (superficial, peripheral or laser station) by rotating table, or belts, or pick & place system.
-
SOFTWARE ELABORATION
Software inspects the images of the parts taken by the inspection units.
-
PARTS REJECTION
If defect are detected parts will be rejected.
-
‘GOOD’ PART COLLECTION
If partes pass all controlled parameters, they will be collected in ‘good’ bin or packing system.
Technical characteristics
ITEMS/PARTS
| Type of Parts | Elastomers, rigid materials |
| Color | All, not transparent |
| Parts Inspected | Micro O-Ring |
| Characteristics | Clean, free of dust that could alter the part’s surface |
| Size | 0.5 - 9 mm |
| Chord/Height | 0.5 – 2 mm |
VISION
| Resolution | (A) 0.004 mm/pixel (B) 0.005 mm/pixel |
| Zoom | No |
| Type of Camera | Matrix |
| Maximum Framed | From 10 to 20 mm |
| Camera Resolution | 5 MP |
CHARACTERISTICS
| Speed | Up to 5 pts/s |
| Load | Automatic |
| Type of Machine | Single-table |
| Noize Level | < 75 ㏈ |
| Three-Phase Power Supply | 230 – 480 v |
| Maximum Installed Power | 4 Kw |
| Average Consumption | 1.4 Kw |
| Compressed Air Consumption | 400 NL/Min |
Size

Request information
For more information about our company or products, or if you have a question or require clarification, call us or fill out the form located next to this message. Our staff will get back to you as soon as possible.
Call us
Or write to us

